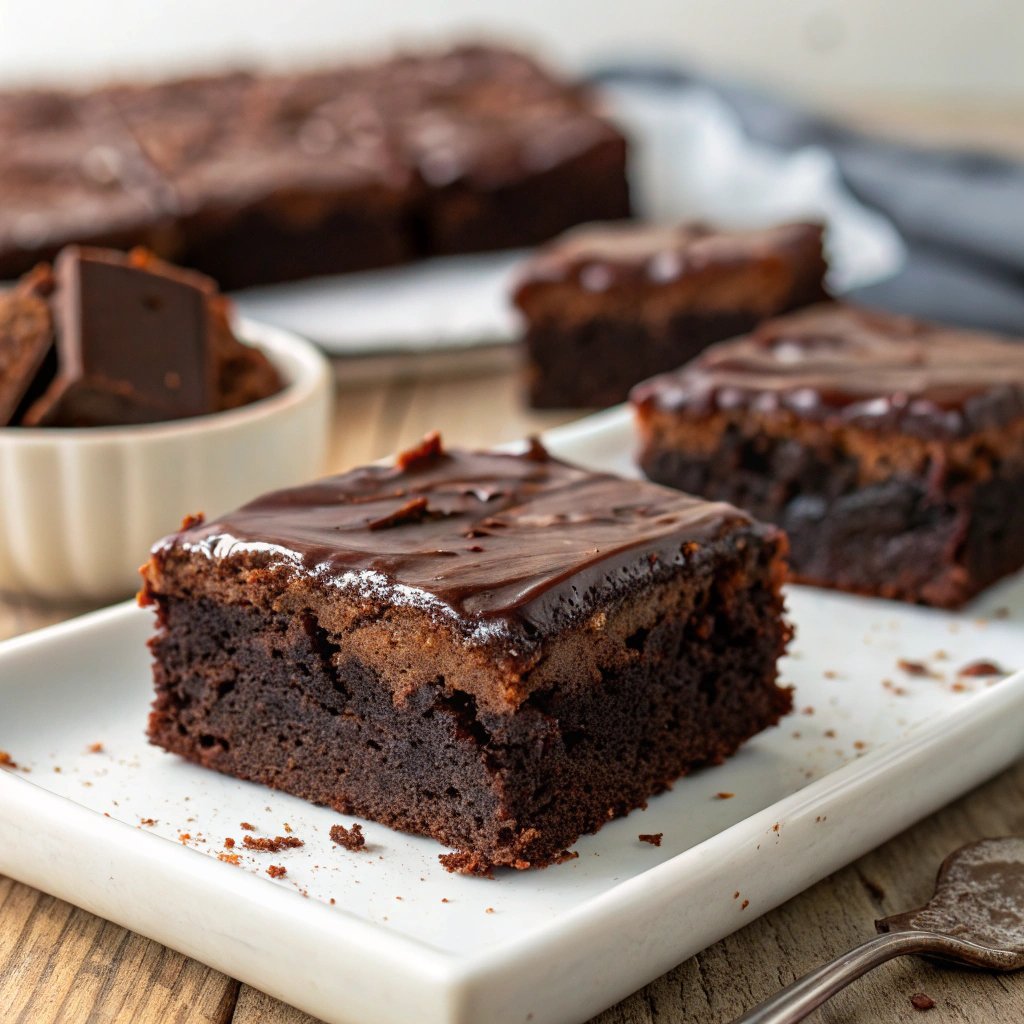
Okay, Let’s Talk Brownies…
Right, buckle up buttercups, because we’re making brownies. Not just any brownies, mind you. These are the *ultimate* fudgy brownies with ganache – the kind that stick to your teeth in the best possible way. I first made these years ago after a particularly rubbish day, you know the kind? Needed some serious chocolate therapy, and honestly, nothing else quite hits the spot. My daughter now asks for these for basically every birthday, holiday, or Tuesday. They’re just *that* good. Forget cakey imposters; we’re going deep, dark, and decadent here. It’s messy, it’s chocolatey, it’s glorious.
Why You’ll Be Making These All The Time (Probably!)
Look, I make these when I need a guaranteed crowd pleaser. Or when I need to bribe my kids. Or, let’s be real, when *I* just need a moment with a square of chocolate heaven and a cup of tea. My family goes absolutely bonkers for this recipe because:
- They are PROPERLY fudgy. Like, ridiculously so. No dry corners here, promise.
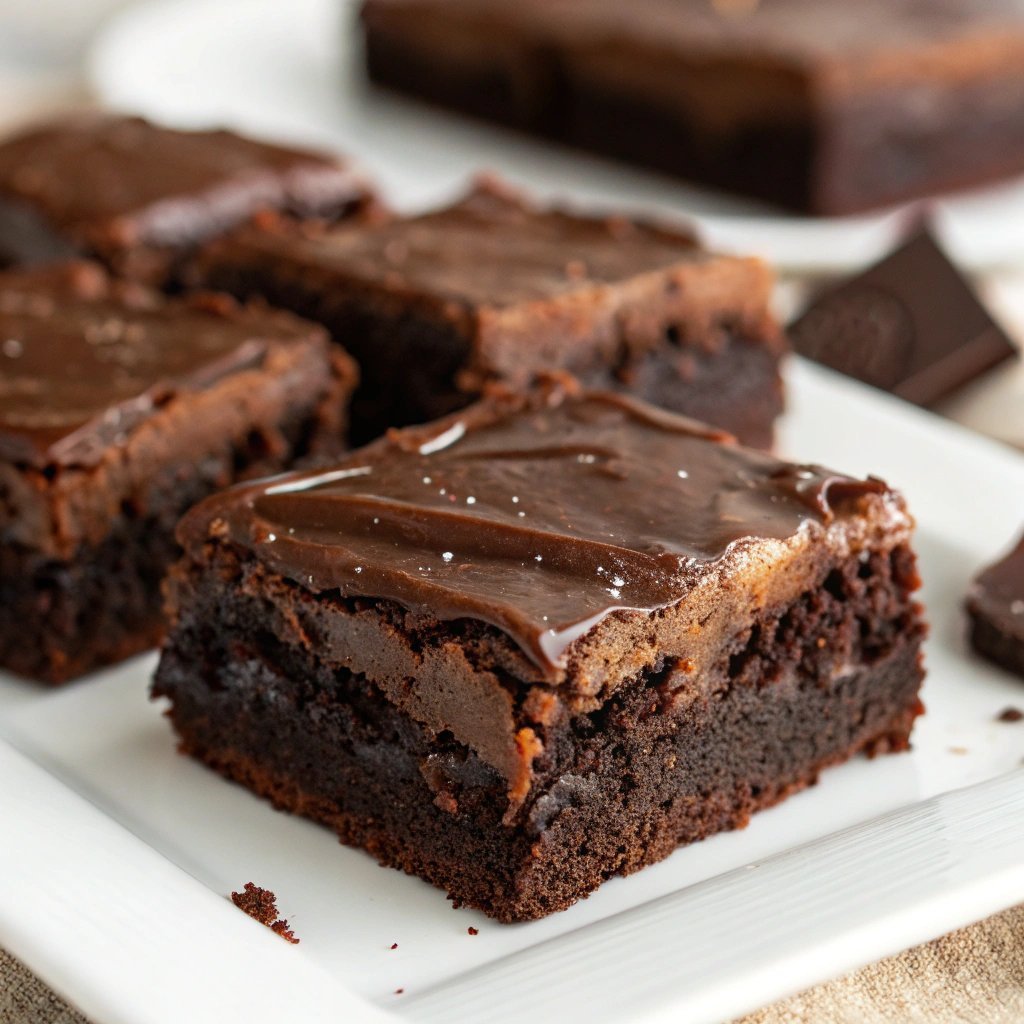
- That ganache topping? Oh boy. It takes them form simply delicious to utterly irresistible. It’s smooth, rich, and just melts in your mouth.
- They’re actually not that hard! Seriously. People think homemade brownies are tricky, but these are pretty straightforward (famous last words, eh? No, but really).
- They look impressive! Even if you’re like me and your decorating skills are… questionable… the glossy ganache makes them look super fancy. (My secret weapon for potlucks!)
Honestly, the hardest part is waiting for them to cool before slathering on the ganache and cutting into them. Patience is not my strong suit when chocolate is involved.
What You’ll Need (The Good Stuff)
Okay, ingredients time. Don’t panic, it’s mostly pantry staples if you’re a fellow baking enthusiast. If not, they’re easy to find!
For the Fudgy Brownies:
- 1 cup (2 sticks or 227g) unsalted butter, plus a bit more for greasing the pan
- 1 cup (200g) granulated sugar
- 1 cup (210g) packed light brown sugar (dark brown works too, just a bit more molasses flavour)
- 4 large eggs, at room temperature if you remember!
- 1 teaspoon vanilla extract (the good stuff if you have it, makes a difference I reckon)
- ¾ cup (65g) unsweetened cocoa powder (I like Dutch-process for deep flavour, like the kind King Arthur Baking sells, but natural works too)
- ½ cup (65g) all purpose flour
- ½ teaspoon baking powder (just a touch for lift, not too much!)
- ½ teaspoon salt
- Optional but amazing: 1 teaspoon instant espresso powder (dissolve it in the vanilla maybe? Or just chuck it in. It doesn’t make them taste like coffee, just deepens the chocolate!)
- Also optional: 1 cup (about 170g) chocolate chips or chunks (semi-sweet or dark chocolate are my faves)
For the Chocolate Ganache:
- 1 cup (about 170g) good quality semi-sweet or dark chocolate chips or chopped chocolate bar (Use something you’d enjoy eating on its own! My grandmother always insisted on Ghirardelli, but honestly any decent brand works fine.)
- ½ cup (120ml) heavy cream
- 1 tablespoon unsalted butter (optional, adds extra gloss)
Right Then, Let’s Get Baking!
- Prep time! Preheat your oven to 350°F (175°C). Grease an 8×8 inch baking pan really well with butter, then line it with parchment paper, leaving some overhang on two sides like little handles. This makes lifting the brownies out SO much easier later. Trust me on this.
- Melt the good stuff: In a medium saucepan over low heat, melt the butter. Once it’s melted, remove it from the heat and whisk in both the granulated and brown sugars until combined. It might look a bit grainy, that’s okay. Let it cool down just a tad – you don’t want scrambled eggs!
- Eggs and Vanilla: Whisk in the eggs one at a time, mixing well after each addition. Then stir in the vanilla extract (and the espresso powder if you’re using it).
- Dry Ingredients: In a separate bowl, whisk together the cocoa powder, flour, baking powder, and salt. Whisking gets rid of lumps! Add the dry ingredients to the wet ingredients and mix gently with a spatula until *just* combined. Seriously, don’t overmix! That’s the secret to fudgy, not cakey. Lumps are fine, maybe even good. Okay, maybe not *good*, but better than overmixing.
- Chocolate Chips (If Using): Gently fold in the chocolate chips or chunks, if you’re adding them. This is where I usually sneak a taste of the batter… chef’s privilege, right?
- Into the Pan: Pour the batter into your prepared pan and spread it out evenly. It’ll be thick.
- Bake! Bake for 30-35 minutes. How do you know when they’re done? Well, a toothpick inserted into the center shouldn’t come out totally clean – you want moist crumbs clinging to it! That’s the fudgy sweet spot. If it comes out clean, you’ve gone slightly too far (still edible, just less fudgy). Don’t worry if the edges look set but the middle seems a little soft, it continues cooking as it cools.
- Cool Down Crucial Step: Let the brownies cool COMPLETELY in the pan on a wire rack. Like, completely. Hours, even. If you try to add warm ganache to warm brownies… well, let’s just say I learned that lesson the messy way. Patience, grasshopper!
- Make the Ganache: Once the brownies are cool, make the ganache. Place the chocolate chips (or chopped chocolate) in a heatproof bowl. Heat the heavy cream in a small saucepan over medium heat until it just begins to simmer (don’t let it boil over!). Pour the hot cream over the chocolate and let it sit undisturbed for about 5 minutes. This lets the cream melt the chocolate gently.
- Whisk it Good: After 5 minutes, gently whisk the mixture until it’s smooth, glossy, and gorgeous. Whisk in the optional tablespoon of butter now if you’re using it, for extra shine.
- Top it Off: Pour the ganache over the cooled brownies in the pan. Gently tilt the pan or use an offset spatula (or the back of a spoon, let’s be real) to spread it evenly.
- Chill Out (Again!): Let the ganache set. You can leave it at room temperature for a couple of hours, or pop it in the fridge for about 30-60 minutes until the ganache is firm but not rock hard.
- Cut and Devour: Once the ganache is set, use those parchment paper handles to lift the whole glorious slab out of the pan onto a cutting board. Run a large sharp knife under hot water, wipe it dry, and then cut into squares. Repeat the hot water trick between cuts for cleaner slices (or don’t, if you like rustic!). Now, finally, EAT ONE. Or three.
Little Notes and Discoveries
- Don’t Overbake! Seriously, this is the number one brownie crime. Err on the side of underbaking slightly for maximum fudginess. They set up as they cool.
- Room Temp Eggs? People say it helps them incorporate better. Honestly? I forget half the time and they still turn out great. So don’t stress too much.
- Quality Chocolate Matters: Especially for the ganache, using chocolate you love the taste of makes a big difference. But also, don’t break the bank! A good supermarket brand dark chocolate works wonders.
- Cooling is Key: I know I keep banging on about it, but letting the brownies cool completely before adding ganache AND letting the ganache set before cutting makes life *so* much easier (and less messy).
Fancy Some Variations? (My Experiments)
I love messing with recipes! Here are a few things I’ve tried:
- Nutty Buddy: Toasted walnuts or pecans folded into the batter? Classic and delicious. About ¾ cup usually does it.
- Minty Fresh: Add ½ teaspoon of peppermint extract along with the vanilla for a mint chocolate vibe. Maybe sprinkle some crushed candy canes on the ganache during the holidays? Super festive.
- Peanut Butter Swirl: Before baking, dollop about ½ cup of slightly warmed, creamy peanut butter over the batter and gently swirl it in with a knife. Oh heavens.
- Salted Caramel Surprise: Drizzle some salted caramel sauce over the ganache before it fully sets. Next level stuff. You can find decent jarred stuff or make your own if you’re feeling adventurous (I like Smitten Kitchen’s recipe for that).
- The One That Didn’t Work: Okay, so I tried a raspberry swirl once. Added fresh raspberries to the batter. It made the brownies kinda… wet? And the flavour didn’t quite pop. Maybe a raspberry jam swirl would be better? Haven’t tried that yet!
What Gadgets Do You Need?
Nothing too wild here. A saucepan, mixing bowls, whisk, spatula. An 8×8 inch square baking pan is ideal – metal pans conduct heat best for brownies, I think. If you only have a 9×9 pan, that’s okay! Just know your brownies will be a bit thinner and might bake a tad faster, so check them a few minutes earlier. A stand mixer or electric hand mixer makes whisking the eggs and sugar easier, but honestly, a bowl and a strong arm work just fine too. Builds character, right?
Sometimes I think about my grandmother whisking everything by hand. She made the best cakes, never used an electric mixer in her life. Different times!
Storing These Beauties
Store the cut brownies in an airtight container at room temperature. I find they actually get fudgier and taste even better on day two! They’ll *officially* last for maybe 3-4 days… though honestly, in my house, a batch has never, ever survived past the 48-hour mark. Ever. If it’s really warm where you are, you might prefer storing them in the fridge, but let them come to room temp a bit before eating for the best texture.
How We Eat Them Around Here
My absolute favourite way? Slightly warmed (like 10 seconds in the microwave, no more!) with a big scoop of vanilla bean ice cream. The contrast between the warm, gooey brownie and the cold, creamy ice cream is just *chef’s kiss*. A dollop of whipped cream works too. Or just plain, maybe with a glass of cold milk. You really can’t go wrong.
Pro Tips (Learned the Hard Way!)
- Don’t rush the cooling before ganache: I mentioned this, but seriously. I once poured perfectly lovely ganache over still-warm brownies. It didn’t set properly, just sort of melted *into* the top layer. Still tasted okay, but it was a sad, sloppy mess. Lesson learned!
- Measure your flour correctly: Spoon the flour into your measuring cup and level it off with a straight edge. Don’t just scoop it straight form the bag! Scooping packs it in, giving you too much flour, which leads to drier brownies. Nobody wants that.
- Use parchment paper!: Seriously, those overhang handles are lifesavers for getting the brownies out cleanly without breaking them or ruining the ganache topping trying to pry them out. Worth the extra 30 seconds.
Quick Q&A (Things People Ask Me!)
Can I use dark cocoa powder?
Totally! I actually prefer it sometimes for a really intense chocolate flavour. Dutch-process or black cocoa powder work great.
My ganache split! What happened?
Ah, nightmare! It can happen if the cream was too hot or if you whisked it too vigorously maybe? Sometimes you can save it by gently whisking in a tablespoon or two of *cold* cream, a little bit at a time. No guarantees, but worth a shot!
Can I double the recipe?
Yep! Just use a 9×13 inch pan and increase the baking time – probably closer to 40-45 minutes, but keep an eye on it using the toothpick test.
Do I *have* to use espresso powder?
Nah, definitely not! They’re perfectly delicious without it. It just adds a little something extra, a depth, without tasting like coffee. But leave it out if you prefer.
Help! I don’t have heavy cream for the ganache!
Oh dear. Honestly, for ganache, heavy cream (or double cream in the UK) works best because of the fat content. You *might* be able to get away with using half-and-half or even whole milk *plus* extra butter, but the texture won’t be quite as rich or stable. It’s a bit of a gamble!


